The “Activate Windows” watermark reminds you that your Windows 10 version is not activated. This tutorial will guide you through the steps to get rid of the “activate windows watermark” and remove the “Activate Windows 10” message in the bottom right of your desktop.
To remove the “Activate Windows” watermark in Windows 10, open Registry Editor and go to HKEY_CURRENT_USER > Control Panel > Desktop. From there, double click on PaintDesktopVersion and set its value to 0, then click on OK and restart your computer. The “Activate Windows” watermark will be removed after restarting your PC.
Why Do I See The “Activate Windows” Watermark?
The “Activate Windows” watermark on the desktop indicates that your Windows 10 operating system is not activated with a valid license. Microsoft reminds you that your Windows version is not valid and that you need to buy an official valid key for your version of Windows to activate all its features.
Windows 10’s features are one of the reasons you should activate it. Many functions of Windows 10 are only available if the license is activated. Such as your system’s dark mode, Windows Defender & Security, Windows Hello, and plenty of other features.
You won’t be able to install Microsoft Office on a “non-activated” version of Windows 10, and you won’t get any Windows Updates, which means your machine will always be subject to bugs, crashes, and infections.
Method 1: Activate Windows” Watermark With Registry
The most effective method to remove the “activate windows” watermark is to edit the Windows registry. We will disable the capability that allows Windows to write text on the desktop by editing the Windows registry. The activate windows message in the bottom right corner of your desktop will be disabled and hidden as a result of this action.
Follow the steps below to remove the “Activate Windows” watermark in Windows 10.
Total Time: 2 minutes
Click the Start button and type “Regedit” to open Registry Editor, and hit enter. (You will be prompted to open Regedit with administrator privileges, click on Yes)
Go to HKEY_CURRENT_USER > Control Panel > Desktop
In the left panel, go to HKEY_CURRENT_USER > Control Panel > Desktop in the folder tree, make sure to click on Desktop. A list of values will show up in the right panel.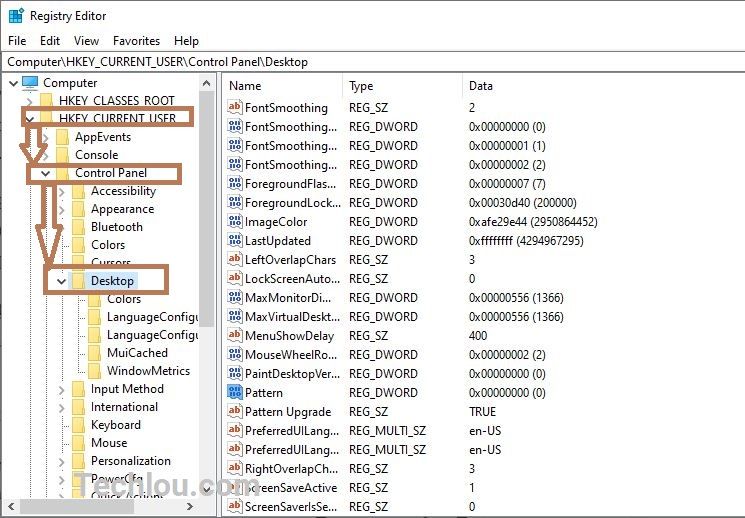
Double click on “PaintDesktopVersion” in the right panel
Scroll down until you find PaintDesktopVersion and double-click on it.
Set the value to 0
Type 0 in the “Value data” textbox. Make sure that the selected base is Hexadecimal.
Click on OK and restart the computer.
Click OK to validate and restart your computer for changes to take effect.
This is how you get rid of and remove the “activate windows” watermark, After restarting your computer the “activate windows” watermark will be removed. (If the watermark reappears after a certain period of time, just run the script again to remove it.)
Method 2: Remove the “Activate Windows” Watermark With a .reg File
To make your life easier, We have made this small .reg script that will automatically remove the activate windows watermark once you click on it.
Follow the steps below to automatically remove the activated windows watermark with a .reg file.
1. Download the script
Click here to download this .zip archive containing a .reg file
2. Unzip the zip file
Uncompress the zip file on your computer (Download 7-zip or Winrar to be able to open the archive)

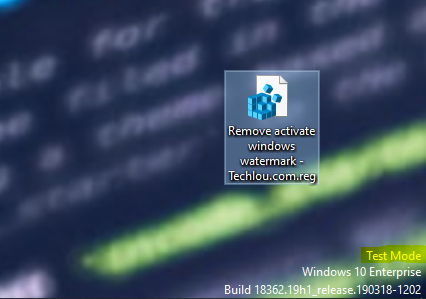
3. Double click on Remove activate windows watermark.reg
Double click on Remove activate windows watermark.reg to execute it.

4. Click on Yes to confirm
Click on Yes to allow the reg file to edit your Windows Registry.
5. Restart your computer
Restart your computer to apply the modification.
6. The activated windows watermark is now removed
After restarting your computer the “activate windows” watermark should be removed.
All this script does is automatize the registry edition that we have done in the first method.
Method 3: Remove “Activate Windows” Watermark With Powershell
With a single command, you can temporarily activate Windows for 90 days. You can repeat this method every three months and reactivate Windows 10. This solution will remove the activate Windows message for 90 days, which you may then renew.
Follow the steps below to remove the “Activate Windows“ watermark with Powershell.
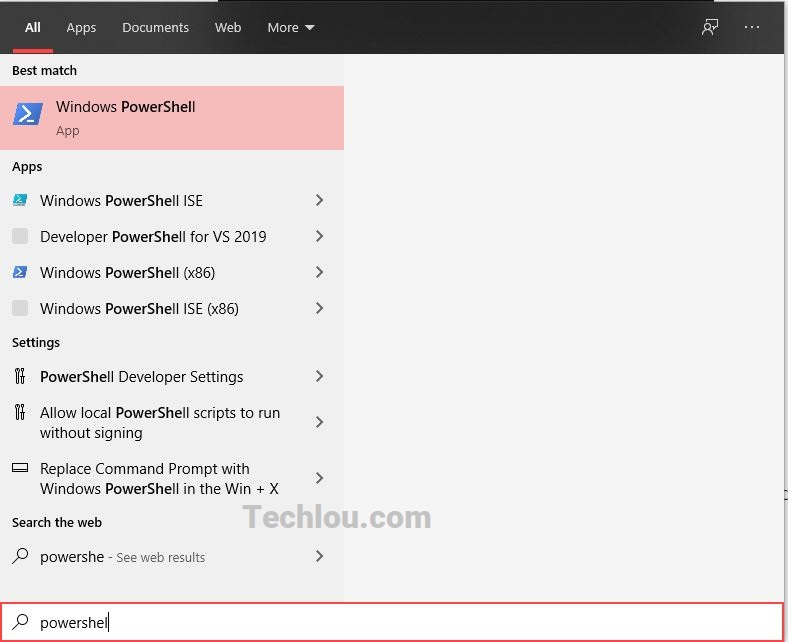
1. Click on Start and type “Powershell”
Click on the Start button or hit the Windows key on your keyboard and type “Powershell“
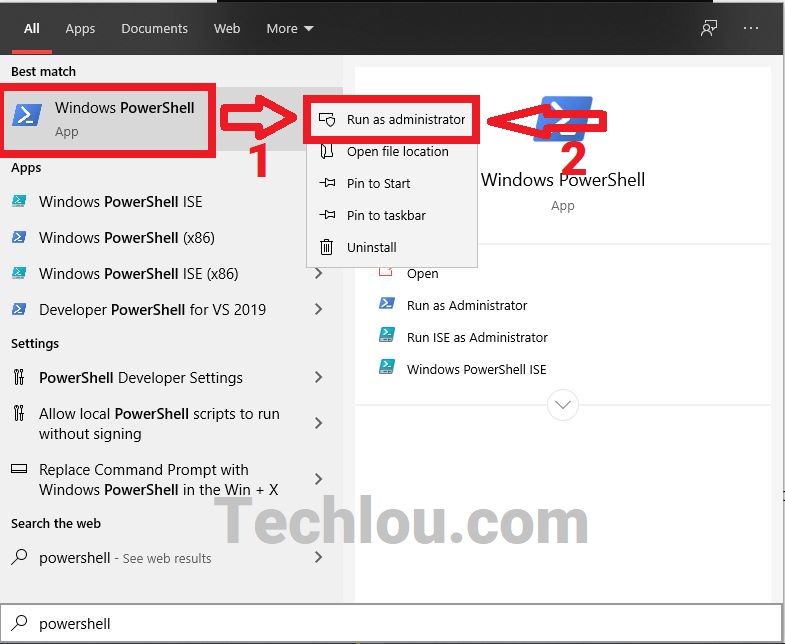
2. Right-click on “Windows Powershell” and click on “Run as administrator”
Right-click on the “Windows Powershell” and run it as administrator.
3. Type “slmgr /rearm” in Powershell and hit ENTER
In the CMD window type “slmgr /rearm” and hit enter to activate Windows 10 for 90 days.

4. Restart PC to apply changes.
Restart your computer to apply the changes, after Windows 10 starting you will notice that the activate Windows message has been removed.
Method 4: Remove “Activate Windows” Watermark With CMD
One of the easiest and quickest ways to remove the “Activate Windows”watermark is by using to disable the test mode if it’s On. Indeed, Windows 10 has a test mode that if is activated will cause the activation message to show on your desktop.
Follow the steps below to remove the “Activate Windows” watermark using CMD
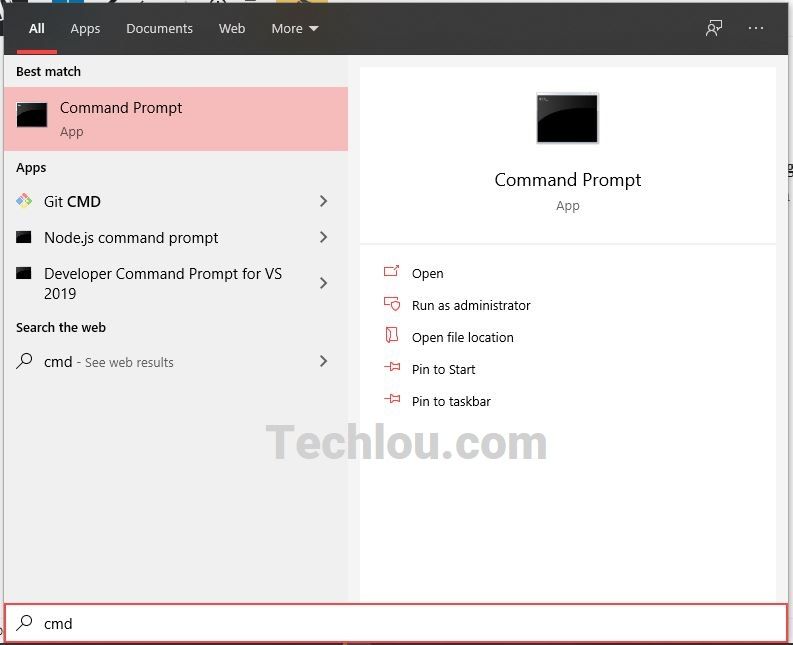
1. Click on Start and type “cmd”
Click on the Start button or hit the Windows key on your keyboard and type “CMD“
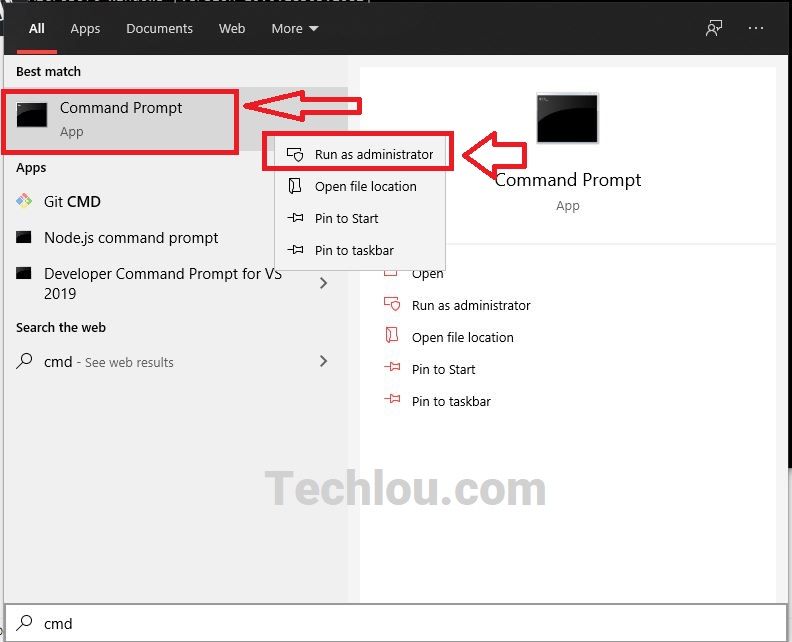
2. Right-click on “Command prompt” and click on “Run as administrator”
Right-click on the “Command prompt” and run it as administrator.
3. Type “bcdedit -set TESTSIGNING OFF” in CMD and hit ENTER.
In the CMD window type “bcdedit -set TESTSIGNING OFF” and hit enter.

4. Restart your computer
Restart your PC to apply changes. After restarting, the “activate windows” watermark should be removed.
Method 5: Remove The “Activate Windows” Watermark By Disabling Background Image
One of the ways to get rid of the “activate Windows” watermark is by disabling the background image from the Ease of Access setting.
Follow the steps below to do so:
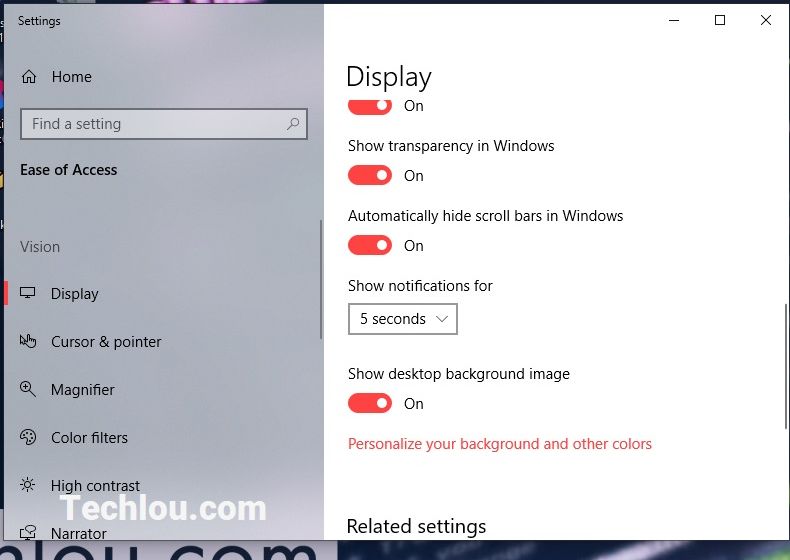
1. Press Windows key + U to open Ease of Access settings
On your keyboard, Press Windows Key + U to open Ease of Access settings (The windows key is the key that has the Windows logo on it, located generally on the left of the Alt button)
2. Scroll down and TURN OFF “Show desktop background image”
Scroll down the list of options until you find “Show desktop background image” and switch the little button to turn it off.
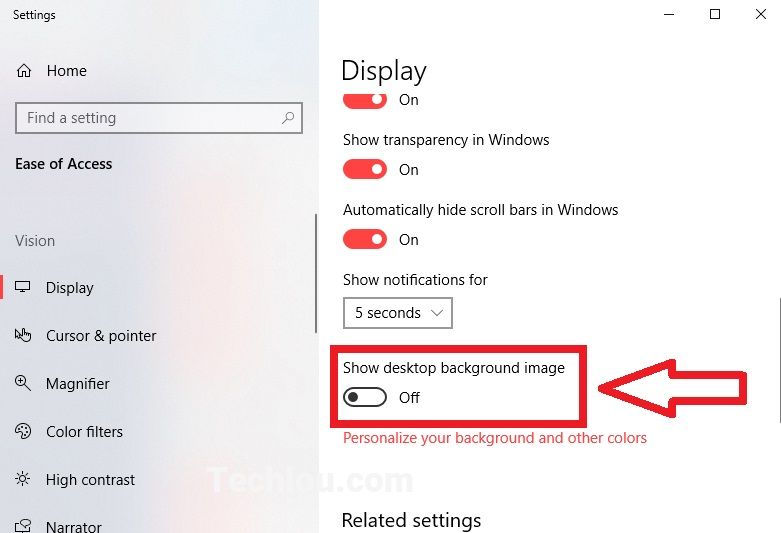
This will hide the desktop background image and remove the “activate windows” watermark at the same time.

The inconvenience of this method is that you will have a black screen as a background and you will not be able to change the background image.
Method 6: Remove The “Activate Windows” watermark Using Script
Follow the steps below to remove the “activate Windows” watermark on the desktop using a .bat script:
- Open Notepad.
- Type the following commands:
- @echo off
- taskkill /F /IM explorer.exe
- explorer.exe
- exit
- Save the file as activate.bat
- Right-click and click Run as administrator.
- Restart PC.


If the watermark reappears after a certain period of time, just run the script again to remove it.
Method 7 : Activate Windows 10
You can permanently remove the Activate Windows watermark by activating Windows 10 with this simple script.
Follow the steps below to activate Windows 10 with the script and remove the activate windows watermark.
1. Open Notepad
Open Notepad on your Windows
2. Copy and paste the script below
@echo off
title Activate Windows 10 ALL versions for FREE!&cls&echo ============================================================================&echo #Project: Activating Microsoft software products for FREE without software&echo ============================================================================&echo.&echo #Supported products:&echo - Windows 10 Home&echo - Windows 10 Home N&echo - Windows 10 Home Single Language&echo - Windows 10 Home Country Specific&echo - Windows 10 Professional&echo - Windows 10 Professional N&echo - Windows 10 Education&echo - Windows 10 Education N&echo - Windows 10 Enterprise&echo - Windows 10 Enterprise N&echo - Windows 10 Enterprise LTSB&echo - Windows 10 Enterprise LTSB N&echo.&echo.&echo ============================================================================&echo Activating your Windows...&cscript //nologo slmgr.vbs /ckms >nul&cscript //nologo slmgr.vbs /upk >nul&cscript //nologo slmgr.vbs /cpky >nul&set i=1&wmic os | findstr /I "enterprise" >nul
if %errorlevel% EQU 0 (cscript //nologo slmgr.vbs /ipk NPPR9-FWDCX-D2C8J-H872K-2YT43 >nul&cscript //nologo slmgr.vbs /ipk DPH2V-TTNVB-4X9Q3-TJR4H-KHJW4 >nul&cscript //nologo slmgr.vbs /ipk WNMTR-4C88C-JK8YV-HQ7T2-76DF9 >nul&cscript //nologo slmgr.vbs /ipk 2F77B-TNFGY-69QQF-B8YKP-D69TJ >nul&cscript //nologo slmgr.vbs /ipk DCPHK-NFMTC-H88MJ-PFHPY-QJ4BJ >nul&cscript //nologo slmgr.vbs /ipk QFFDN-GRT3P-VKWWX-X7T3R-8B639 >nul&goto server) else wmic os | findstr /I "home" >nul
if %errorlevel% EQU 0 (cscript //nologo slmgr.vbs /ipk TX9XD-98N7V-6WMQ6-BX7FG-H8Q99 >nul&cscript //nologo slmgr.vbs /ipk 3KHY7-WNT83-DGQKR-F7HPR-844BM >nul&cscript //nologo slmgr.vbs /ipk 7HNRX-D7KGG-3K4RQ-4WPJ4-YTDFH >nul&cscript //nologo slmgr.vbs /ipk PVMJN-6DFY6-9CCP6-7BKTT-D3WVR >nul&goto server) else wmic os | findstr /I "education" >nul
if %errorlevel% EQU 0 (cscript //nologo slmgr.vbs /ipk NW6C2-QMPVW-D7KKK-3GKT6-VCFB2 >nul&cscript //nologo slmgr.vbs /ipk 2WH4N-8QGBV-H22JP-CT43Q-MDWWJ >nul&goto server) else wmic os | findstr /I "10 pro" >nul
if %errorlevel% EQU 0 (cscript //nologo slmgr.vbs /ipk W269N-WFGWX-YVC9B-4J6C9-T83GX >nul&cscript //nologo slmgr.vbs /ipk MH37W-N47XK-V7XM9-C7227-GCQG9 >nul&goto server) else (goto notsupported)
:server
if %i%==1 set KMS=kms7.MSGuides.com
if %i%==2 set KMS=kms8.MSGuides.com
if %i%==3 set KMS=kms9.MSGuides.com
if %i%==4 goto notsupported
cscript //nologo slmgr.vbs /skms %KMS%:1688 >nul&echo ============================================================================&echo.&echo.
cscript //nologo slmgr.vbs /ato | find /i "successfully" && (echo.&echo ============================================================================&echo.&echo #My official blog: MSGuides.com&echo.&echo #How it works: bit.ly/kms-server&echo.&echo #Please feel free to contact me at msguides.com@gmail.com if you have any questions or concerns.&echo.&echo #Please consider supporting this project: donate.msguides.com&echo #Your support is helping me keep my servers running everyday!&echo.&echo ============================================================================&choice /n /c YN /m "Would you like to visit my blog [Y,N]?" & if errorlevel 2 exit) || (echo The connection to my KMS server failed! Trying to connect to another one... & echo Please wait... & echo. & echo. & set /a i+=1 & goto server)
explorer "https://techlou.com"&goto halt
:notsupported
echo ============================================================================&echo.&echo Sorry! Your version is not supported.&echo.
:halt
pause >nul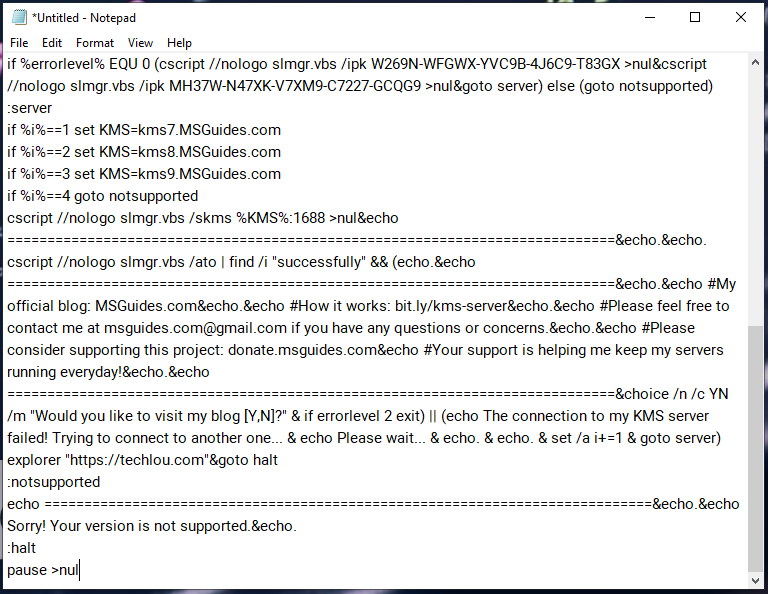
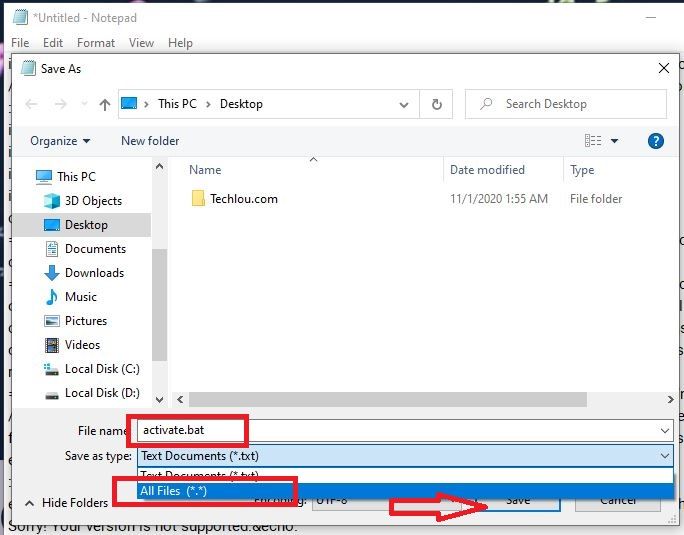
3. Save file as activate.bat
Click on File and save the file as activate.bat. Make sure to select “All Files (*.*)” in the Save file type list and that the encoding is UTF-8.
4. Right-click on saved file and Run as Administrator
Right-click on activate.bat and click on “Run as administrator“

5. Restart PC to activate Windows 10
Restart your computer to apply the activation, after restarting your Windows 10 should be activated and the “activate windows” watermark should be removed.
Note: If you get the message “Sorry! Your version is not supported.” Open CMD as Administrator and type this command “slmgr.vbs /upk” then proceed with the activation.
Method 8: Use Third-Party Software
Last but not least, you can permanently remove the “Activate Windows” watermark using third-party software like Universal Watermark Disabler
Follow the steps below to do so:
- Download and Universal Watermark Disabler
- Unzip the uwd.zip file
- Double click on uwd.exe
- Click on Install


After installation, restart your computer to apply changes, UDW will remove any watermark on your Windows 10 operating system.
Wrap up
In this article, we have seen how to remove and get rid of the “activate windows”watermark using several methods. Please note that none of these methods will replace an activated Windows 10 system with a genuine key. Most of the methods will only help you to hide the “activate windows” message but your Windows is still not activated. Only the Windows activation with a script and Powershell method will help you get your Windows 10 activated and thus benefit from all the features that an activated Windows has to offer (Updates, Fixes, etc).
See also: