A wireless mouse is used just like a traditional mouse, but unlike the latter, you can connect a wireless mouse to your laptop without a USB wire. There are 2 types of wireless mouse: Bluetooth models that connect directly to your computer’s Bluetooth receiver and RF models that connect to a receiver that is connected to your computer. In this article, we’ll see how to connect a wireless mouse to your laptop.
To connect a wireless mouse to your laptop, check whether your mouse is RF Wireless or Bluetooth. If RF Wireless then connect the USB dongle and install the mouse driver. If the mouse is Bluetooth, then activate Bluetooth on your laptop and pair the mouse by pressing the sync button below it.
How to Connect an RF Wireless Mouse To Your Laptop
An RF wireless mouse contains two parts: The mouse and a USB dongle that communicates and exchanges information between the wireless mouse and the computer.
Follow the steps below to connect an RF Wireless mouse to your laptop:
- Open up the back cover of your mouse to retrieve the USB dongle.

- Connect the USB dongle to your PC

- Wait for your PC to install the driver of the USB dongle.
- Insert a battery in your wireless mouse

- Power on the wireless mouse by turning ON/OFF switch to ON position.
- Your wireless mouse is now connected to your PC and can be used.


After turning ON the wireless mouse and installing the driver you should normally be able to use the now connected wireless mouse right away. Make sure that the driver is correctly installed if the wireless mouse is not working. You can connect to the internet to download the correct driver for your mouse if necessary.
How to Connect a Bluetooth Wireless Mouse To Your Laptop
A Bluetooth wireless mouse is a mouse that uses Bluetooth technology to connect to your PC. This type of wireless mouse doesn’t require a dongle.
Follow the steps bellow to connect a Bluetooth Wireless mouse to your laptop:
- Press the Windows Start button and type “Bluetooth”
- Click on “Bluetooth and other devices settings”

- Turn on Bluetooth by turning on the Bluetooth switch.

- Press and hold the sync button below the mouse. The mouse now appears in the list of devices.
- Select the mouse to connect it to your computer.


After pairing your wireless mouse with the computer, it should be connected and work just like any other connected Bluetooth wireless device on your laptop.
How to Connect a Wireless Mouse On MacOS
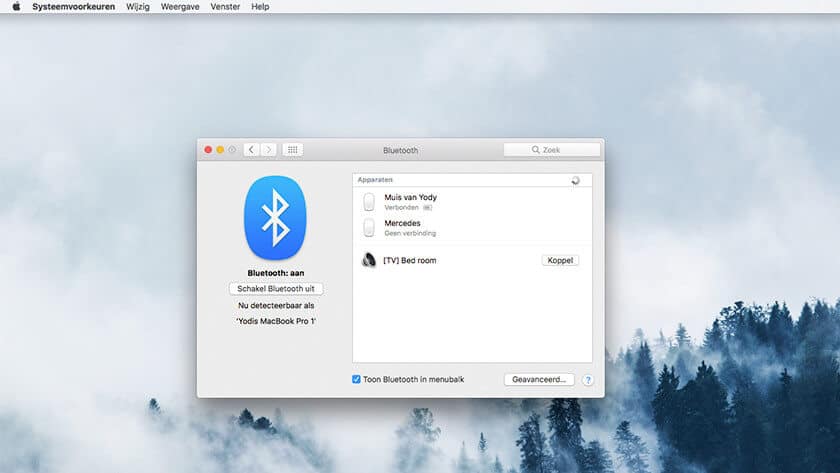
Follow the steps below to connecting a wireless mouse on macOS :
- If your mouse is equipped with a dongle, plug it into the USB port on your MacBook or iMac. If it doesn’t have a dongle go to step 2.
- On the Apple menu, go to “System Preferences” and click “Bluetooth.
- On the Bluetooth menu, select “Enable Bluetooth.
- Press and hold the sync button below the mouse. The mouse now appears in the list of devices.
- Select the mouse to connect it to your computer.
How to Connect a Wireless Mouse On ChromeOS

Follow the steps below to connecting a wireless mouse on ChromeOS :
- If your mouse is equipped with a dongle, plug it into the USB port of your Chromebook. If you don’t have a dongle, Go to step 2.
- Go to your Chromebook settings and click “Bluetooth“.
- Activate Bluetooth.
- Press and hold the sync button below the mouse. The mouse now appears in the list of devices.
- Select the mouse to connect it to your computer.
Conclusion
If you have followed the steps, your mouse cursor may still not move. Be sure to turn on the mouse with the button below it. Also make sure that the mouse is charged, that there are batteries in the mouse and that you have removed the plastic underneath the batteries. You may also need to restart the computer or update the wireless mouse driver.