This short guide shows how to disable Secure Boot on Windows 10 and 8 so that you can install another operating system, other than the currently installed version of Windows, Install some graphics card drivers or other old hardware by disabling driver signature enforcement.
Secure Boot is designed to protect your computer from untrusted firmware. This allows your computer to install and run only verified operating systems and hardware drivers on your system. While this protection is pretty useful for the simple user, this may become really frustrating when you need to install another system on your computer (Like Ubuntu or old Windows version) or when you try to install old devices on Windows as it prevents you from installing unverified drivers on Windows 10 unless you disable driver signature enforcement which sometimes requires to disable Secure Boot before.
How To Disable Secure Boot On Windows 10
Follow the steps below to disable Secure Boot on Windows 10 and 8:
- Hold the Shift key while selecting Restart.
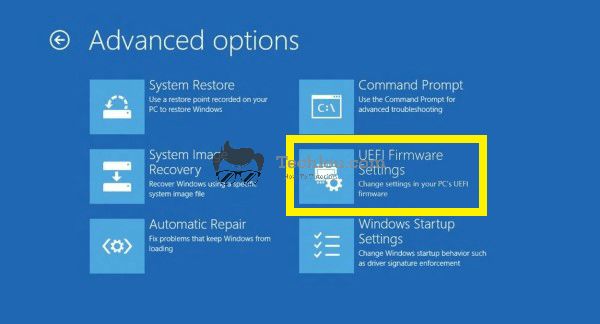
- Go to Troubleshoot > Advanced Options > UEFI Firmware Settings.

- Click on “Restart” to restart your computer into BIOS.
- When your PC is booting, press Delete or F2 to enter Bios settings (The button to access Bios depends on your computer brand, check the correct way to access BIOS for your computer)
- In BIOS, check for the Secure Boot option and set it to Disabled, Secure Boot can be found in either the Boot or Security tab.
- Press F10 to save the configuration and restart your computer
After restart Secure boot will be disabled on your computer. You can now install a different system on your computer or disable driver signature enforcement to install unverified drivers on your computer.
Note: You can find the correct button to press to enter BIOS by paying close attention to your screen while your computer boots. Your computer will usually show the button to press on the bottom of your screen.
How To Re-Enable Secure Boot On Windows 10
To enable Secure Boot on Windows, enter your computer BIOS by pressing Delete or F2 on your keyboard, then check for the Secure Boot option and set it to Enabled (Secure Boot can be found in either the Boot or Security tab). Press F10 to save the configuration and restart your computer.
See also: