In this quick tutorial, we will see how to transpose a row to a column in Excel. This trick is pretty useful if you started typing data into a row, but later realized that you, in fact need that data in a column rather than in row.
How To Transpose Row To Column In Excel
Transpose is a function that allow you to transpose rows to columns in Excel. The data of your row will be converted into a vertical form in Microsoft Excel.
Follow the steps below in Excel to transpose rows to columns:
- Select the rows you want to transpose into columns
- Copy the rows you have selected by right-clicking with your mouse and clicking on Copy.
- Left-click on the first cell where you want to paste your data
- Click on the little arrow next to the Paste button’s icon
- Click on Paste Transpose
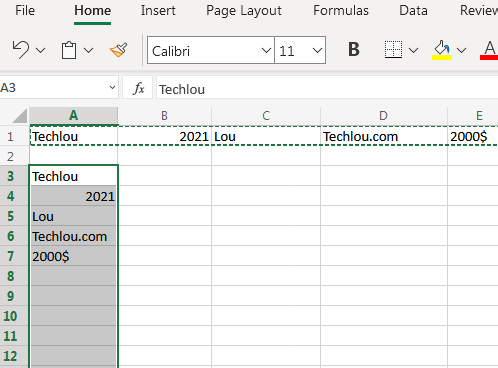
After pasting using Paste transpose, the row you have selected will be transposed to rows starting from the cell you have choosed
How To Transpose Row To Column In Older Versions Of Excel
On older version of Office like Office 2007 or Office 2013, the procedure to transpoe row to columns in excel is pretty similar although there is not a ready-made button to transpose row to columns.
Follow the steps below in older versions of Excel to transpose rows to columns:
- Select the rows you want to transpose into columns
- Copy the rows you have selected by right-clicking with your mouse and clicking on Copy.
- Left-click on the first cell where you want to paste your data
- Click on Paste Special

- Click on Transpose

- Click on OK


After clicking on OK, Excel will transpose the rows to columns.